
 : : : Lessons : : How to tension your drum skins (or "drum heads")

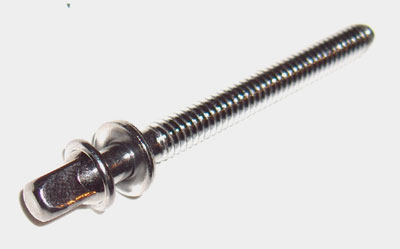 The most current drums are equipped with square head tension bolts (or rods). They require a special key with a square hole
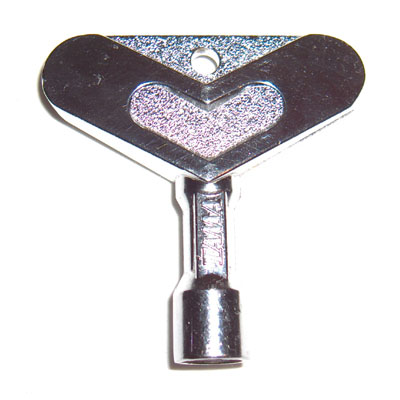
 (usually supplied with the instruments, but also purchasable singly). Have always this type of key on you, even and especially when you go to use a drumset in music studio for rent, in order to tension and adjust the skins at your convenience (each drummer has his habits and preferences in this matter).

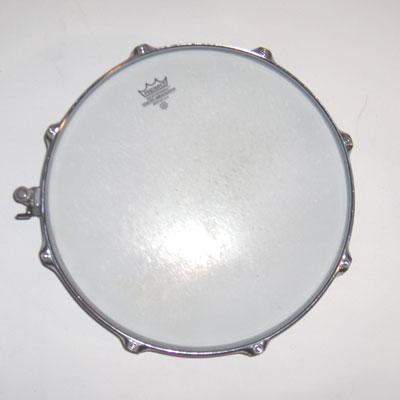
The figure 1 below shows the most coherent order of bolts tightening for a 6 lugs drum, to obtain a homogeneous skin tension ("star-shaped" tightening). You must tighten first the bolt opposite to the first, then the bolt opposite to the second adjacent to the first (on the left or right) and so on, by making sure to turn always in the same direction. Note that you must absolutely not tighten a first bolt entirely and then the other (which will decenter the skin), but tighten gradually due to a half-turn of the key aproximatively by passage, revolution (which involves several "stars") , starting from a loose skin, the bolt heads touching the drum hoop. The limit of looseness of a drum skin to be played is when it loses any fold or hollow.
 8 lugs drum
 : : click to enlarge : :
For a drum with 8 lugs, you can use another schema that I recommend (but more complex), which was inspired to me by the traditional system for the tension of canvas on a frame for painting: the "swastika " system, presented below (which consist first to tension in square and then fill the sides progressively in square too and by turning). The advantage of this this system is to not "over-stretch" the first tension bolts, in one direction, even if the skin is not decentered.

We are not obliged to use these systems literally, but knowing their principle helps to avoid big mistakes and problems (too much tension on some bolts which implies different tones and less resonance, decentering of the skin which can break more easely, drum hoop deformation, etc.).
It is very important before tightening a drum skin, to make sure that the threads of the bolts are well oiled and without any dust (otherwise you will not be able to tighten them completely, and they can be stuck). Some "down-market" instruments are mounted without grease (beware). An oil can will be necessary then, and do not be content to pour oil on the bolts already screwed: you must take off them and lubricate the entire length of their thread, without excess or overflow, however.
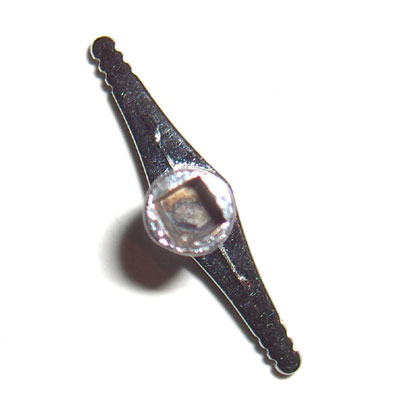
Some drummers use an L type box spanner and even electric screwdrivers, to go faster. For my part, I prefer the standard wing ("butterfly") drum key, which allows to really feel the tension. To save time, I use to start one key per hand (good work for ambidexterity!), tightening two bolts diametrically opposed at the same time (see third figure below). Note that this simplifies the structure for a balanced tension (provided you to make the same number of turns of the bolts and with the both hands at the same time).
")
To tune your drum skin, it is nevertheless necessary at the end of the tightening, to hold a drum stick in one hand, to properly test the note and a drum key with the other hand.
The distribution of fundamental tones (most audible tone) on a diameter of the skin is a bit like distribution on a string of a string instrument: there is an infinity that descends and ascends gradually (the lowest note being on center, and the highest, on the edge, the closest to the rim). Therefore, to compare auditorily the tensions between each pair of diametrically opposed bolts, you must strike on the same arbitrary distance from the rim (except the center of course). The closer to the rim and a bolt is the best, to isolate the sound. You will see that a precise adjustment (or "tuning") implies a precision of a quarter turn of the key at most.
Some drummers tune their drum like a traditional harmonic musical instrument. For my part, I find it a little silly, considering the fact that depending on where you hit the skin (which can not be identical because of passages and striking with both hands) the tone (or sound "frequency") will necessarily be different. Also note that the distance of the listener affects the perception of this fundamental tone, especially for instrument with timbre and form (and thus spatial spreading of sound), as complex as the drum (classically, it is recognized in European music that a drum does not have a precise tone). The strength of the stroke is also highlighting one or other tone (a loud stroke ("forte") will highlight the high tones by increasing the speed and frequency of skin vibrations at the start). Finally, time and space also work because bass tones travel farther and penetrates better materials than the treble (so we hear first the higher tones and gradually resonance increasingly lower, or even no high tones if we are very far from the source of the sound, like in the case of thunder).
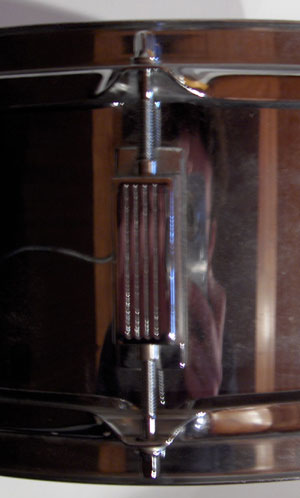 Double tightening tension system
 : : click to enlarge : :
Note that each drum skin can resonate in sympathy, and especially if its fundamental tone is close to the skin hitted, which reinforce to blur the basic tone depending on the number of drums of the set. It is possible to significantly increase the resonance of a drum by tuning the two skins (of hitting (or "batter") and resonance), in the same pitch (so they vibrate, "in resonance", one pulling the other, like someone who always pushes a children swing at the right time, when it reaches its peak). But it is quite logical to use the specificity of the double tuning, stretching more the hitting drum skin (in order to resist to the impact and give a more accurate attack) than the resonance (to give "depth" to the sound), giving this quick "glissando" sound so typical of the modern toms.
I recommend a very practical method to mute any skin without taking off during tuning (which was inspired to me by Dave Weckl). "Remove" your drum from its stand (or mounting bracket), and place the skin to mute on your knee (you must be seated). You can also strike with the key on the skin, to hear its tone, but it is more difficult to hear.
Know that the more you will stretch a drum skin, the more it will be resistant to hitting and the more your stick will have a significant and precise rebound, because the skin will be more elastic and less influenced by chaotic vibrations (from the resonance skin above all). On the opposite, the sound of the drum will be drier and less controllable (more sensitive in term of dynamics, instensity differences). This is why in matter of drum skin tuning, there is no "panacea", and it is often ultimately the "taste" that will prevail in the final decision, or preference for a particular type of hitting (high tension to highlight the dynamics and rebounds, or low tension for a playing more "straight" and with "hammered" single stroke roll, for example). In my case, I stretch quite strongly (but not extremely) my snare drum hitting skin, and loosen nearly completely my toms and my bass drum with shell made of not very resonant woods ("mahogany" and "beech" for example) and moderately for very resonant woods (like "maple" or "birch"). This allows accentuating the natural characteristics of different types of instruments and thus having a kit very "contrasted" and expressive overall. This is the type of tuning that is commonly used in rock (the jazz drummer generally stretch all drums extremely, to help strokes with rebound, the dynamics and even "accidents", interesting for improvisation).
I will conclude this lesson by saying that the fundamental principles presented here are valid for all the drums (even hand drums) and every drum skin (natural or synthetic).

Marc De Douvan, december 2005, augmented and translated in english in december 2012.
© 2005 Marc de Douvan Crédits Mentions légales